
Hey everybody, my name is Mortis5000, and I am a sprite animator on Newgrounds you can check my sprites movies out HERE. The reason why I'm writing this tutorial is because its kind of hard to start in flash when you have never flashed before...and you may have just seen a flash movie or game and you want to learn how to do it and that's the basis of why this tutorial was made. Ok now to get started!
STEP 1: What Is It Going To Be About?
What Is Needed:
A Brain
A Imagination
The very first thing you want to think about is what is your sprite movie going to be about. If you already have a good idea then proceed to step 2. Before starting to flash you should always have something to work off of... for instance you may want to have Ryu vs Blanka, Ironman vs Doctor Doom, Sonic vs Knuckles or even a crossover such as Sonic vs Juggernaut or Strider vs Dark Lee. Once you develop your story or plan, let's go to step 2.
STEP 2: Getting Flash For Free
What is Needed:
Internet
What Your Going To Have:
Adobe Flash
In this step you need to get Flash. If you already have a full version of Flash you can proceed to step 3. If you have the trial version and want the full version this step is for you. I have created a Youtube video before creating this tutorial. CORRECTION: Youtube deleted my video, so I suggest you look up "how to get flash cs3 or cs4" on Youtube there are plenty of videos.
STEP 3: Compiling Your Sprites
What Is Needed:
Internet
What Your Going To Have:
Fighter Factory
In the previous step you made a game plan, then you obtained Adobe or Macromedia Flash. In this step you will now start your pre-production of your Flash movie. When compiling your sprites they're are a lot of ways to do this...I'm going to show you the most efficient way that I use and then I will explain the other methods.
MUGEN and Fighter Factory Method:
This is the way I use. Basically what this method is it basically takes out all the hard work of getting your sprites and sounds and avoids you having to cut out sprites from a sprite sheet... The first thing you want to do is download Fighter Factory. Fighter factory is a program that creates characters, stages, Lifebars, menus and much more for MUGEN. It can also decompile sprites and sounds very quickly. Once your done downloading and installing fighter factory.
Go to Google and type in
esnips mugen (character name)Usually you can find your character there or you can also search several websites for characters and/or stages. The one I use the most is MUGEN-INFANTRY. Once you download your character unzip or winrar it (if needed) and place it where ever you can remember it. Now open up Fighter Factory and go to File->Open Character. Look up your character and open him or her up. Now if you did everything right then you should see a pic in the middle of fighter factory. Click the photo symbol on the top it should place you in the sprites section of fighter factory. On the left you will see a menu, you need to click Activate Transparency. This will take the usually pink background off the sprite. Once you have that done go up and click Sprites and go to Save All Sprites As PCX. A window should pop up...pick a location where you want to store your sprites and then name your sprites, the last option you want to do is set the save type as Graphics Interchange Format or .GIF for short. Once you confirm the pop up screen should disappear and if your computer fast enough you should see the bar on the left scroll all the way to the right and all the sprites flashing on the screen. If your computer is slow then fighter factory will seem like its frozen. Give it a couple of minutes and it will come back to the sprite that your started the save on. Now if you check the place where you saved the sprites at you will see that all the sprites have been saved and are all cut out with a transparent background. Now for the sound...go back to Fighter Factory and go up and click Sounds and go down the menu to Save All Sounds, if you want to check out the sounds use the menu on the left. Basically follow the same format and you will have sounds with your sprites. Now you repeat the same steps for any character...you should at least have 2 characters. Now you have basically completed one of the most time consuming things which is character pre production, done in minutes. Ok now that you have your characters sprites, you have to go and get the background...usually for the background I take different pieces from a lot of background and create a custom background but if you want to look for exact background use GOOGLE. You can type
(Stage Name) Mugen
You can also use esnips, or you can go to Mugen Infantry for some stages. Basically you follow the same steps, there are two exceptions, the first is when you export the sprites from the stage you have to build them in either Flash or an image editing program like Adobe Photoshop. The second is there are no sounds with stages, if you're looking for the sound you may have to look for it somewhere else.
STEP 4: Animating
What Is Needed:
Adobe Flash or earlier versions
Internet
What Your Going To Have:
A Sprite Movie
Ok in the previous steps you have created your game plan, you have also compiled your sprites and your stage sprites. Now you are ready for animating in Flash. So open up Flash, depending on what version of Flash you're working you want to work in 2.0 version of actionscript. Good sprite movies FPS (Frames Per Second) are around 24-30fps. You will see that the default is 12 fps you want to make this a higher number because the general rule is the faster the FPS, is the smoother the animation. The first thing that you want to do is press
F11Start to import the sprites into your library, so the way to do this is by pressing [CODE]
Ctrl + RNow locate where you placed your sprites and select the sprites. You can import as many as 250 images at one time. When you're done with importing your characters and the stage sprites, you want to start building your background. For each image of the background you want to put it on a different layer. The reason you use layers is because you want to make sure everything is easily organized. To create a new layer you go to where you see SCENE 1 if you look up and left from their you should see four icons, click the one farthest left. Now you do that for every image in you background. If you happen to have a background that is moving then you will need to use a movie clip. A movie clip is an animation that runs on its own timeline. If that sounds confusing I will show you. You want to press [CODE]
Ctrl + F8A window should appear I suggest to name your movie clips, because as you start to make more complex movies you will have a lot of these movie clips, you just want to start to organize as soon as possible. So you name it and make sure movie clip is selected press ok. The window change giving you another blank workspace..now you are within your movie clip...ok the background images that move you want to put them here, first you want to make more than one keyframe so you press [CODE]
F6This will add more than one keyframe an easy way to navigate between the frames are
,=previous frameand
.=next frameSo you put each image in the keyframe and then make sure they are in the same position. You can press ENTER and play it to see how it looks. When you're done go to SCENE 1 and press the blue arrow on the left. You should be able to see the main timeline. Now you go through your library and find the movie clip and put it in one of the layers. Once you finish the background press
Ctrl + EnterThis shortcut allows the movie to be played as though it was a .swf file. If you have an animated background it should be moving now the movie clip should be looping. Ok you have now successfully created a background now. Next were going to make two new layers. Make sure these layers are above the background layers. Make sure you lock the background layers by clicking on the lock or you can lock them all by clicking the lock at the top. You name the first new layer Attacker (make sure this layer on top of the next layer) and the second Defender. The reason you created these two layers is because you always want the person who is attacking on the top so people can actually see them hit each other.
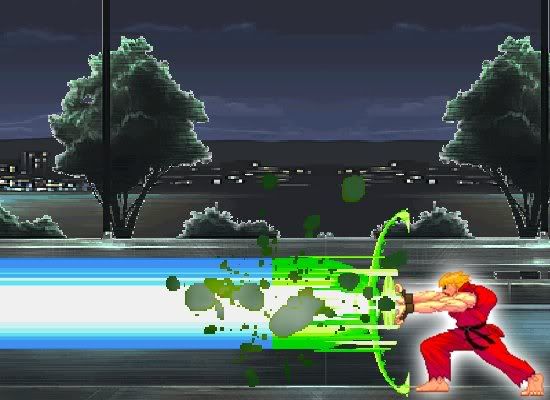
PICS AND MORE UPDATES WILL BE HERE SOON!

2 comments:
i've been looking for a tutorial like this for years!! thanks alot for this, i'm gonna start making my own stuff using this format...
very helpful 🌟😁👍
Post a Comment